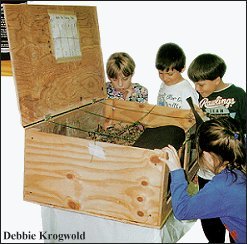
Use 5/8" exterior grade plywood, with the exterior side facing inside, or scrap lumber. (Don't use treated wood.) Using screws, or nails with a spiral shape, will hold the box together under wet and dry conditions. Any wooden box will last longer if it's allowed to dry thoroughly after worm harvest.
For a 2'x 2'x 10" box (suitable for two people, or up to 4 pounds of scraps per week)
- Sides: 22 3/4" x 10"
- Ends: 24" x 10"
- Bottom: 24" x 24"
- Top: 24" x 24"
For a 2'x 3'x 12" box (suitable for three to six people, or up to 6 pounds of scraps per week)
- Sides: 34 3/4" x 12"
- Ends: 24" x 12"
- Bottom: 24" x 36"
- Top: 24" x 36"
Assembly: Nail or screw the ends to the outside edges of the sides. Secure to bottom with five to seven nails or screws per side. Drill nine to 12 quarter-inch drainage holes evenly spaced across the bottom surface. The top is not attached; it just slides on or off.
Options: Nail 2"x2" pieces along the inside bottom edges for support. Attach four small wooden blocks to the bottom corners to raise the box off the ground -- or secure four casters to the bottom corners for a box-on-wheels. Use gate hinges to attach the top to the box.

