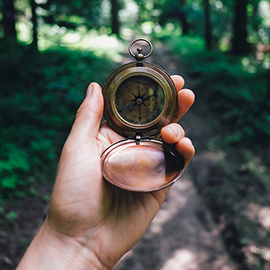
How did the explorers of long ago find their way around? They used a compass and a map. Compasses are still used today to help people navigate across the landscape. They are used just for fun in the sport of orienteering.
Orienteering is navigating with a map and compass. It's easy to learn, but always challenging. Orienteering is often called the "thinking sport" because it involves map reading and decision-making in addition to a great workout - usually walking to a desired location. Any kind of map may be used for orienteering (even a street map), but the best ones are detailed five-color topographic maps developed especially for the sport. Orienteering maps show boulders, cliffs, ditches, and fences, in addition to elevation, vegetation, and trails.
Orienteering is a sport for everyone, regardless of age or experience, but before you can try it, you need to know how to read a compass.
Getting to know a compass
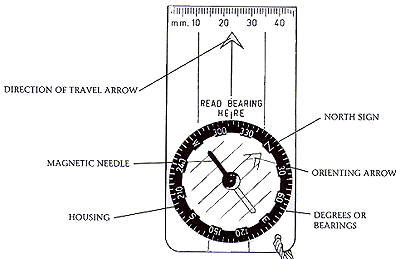
This first step in becoming an explorer is to learn how to read and use a compass. There are many types of compasses. This will get you started with a compass that has a rectangular base, a rotating dial, and housing made of clear plastic.
- Find the directional signs, north, south, east and west. North is the most important direction to help orient yourself. Now find the orienting arrow, magnetic needle, and the direction of travel arrow on your compass.
- Notice that the magnetic needle points naturally towards the earth's magnetic north pole. Be careful to keep your compass away from metal, like a zipper, because it can affect the magnetic needle and lead you in the wrong direction.
- Hold the compass level in the palm of your hand near your chest, with the direction arrow facing away from body.
- Turn the housing so the N is lined up with the red end of the magnetic needle.
- Turn the housing so the E is lined up with the direction of travel arrow. Now you're ready to use the compass.
Using a compass
Now that you've taken a closer look at your compass, go outside and give this fun activity a try.
Pick up four stones or twigs to use as markers. Put them in your pocket. You might find it helpful to have someone read the following directions to you.
- Place a marker where you are standing.
- Turn the housing on the compass so that N (north) lines up with the direction arrow.
- Hold the compass level in the palm of your hand, chest high, with the direction arrow facing away from your body.
- Turn your whole body, including your feet, until the red magnetic needle lines up with the orienting arrow on the dial.
- Look up. Choose a landmark, like a rock, tree or sign which is exactly ahead of you in the distance. Take six steps toward that spot without looking at the compass. Stop. Place a marker here.
- Turn the housing on the compass so that W (west) lines up with the direction arrow. Repeat steps 3, 4, and 5.
- Turn the housing on the compass so that S (south) lines up with the direction arrow. Repeat steps 3, 4, and 5.
- Turn the dial on the compass so that E (east) lines up with the direction arrow.
Repeat steps 3, 4, and 5.
Did you return to your first marker?
Go back and walk to each marker.
What shape did you make? You should have made a square.
Now repeat the activity using the following degrees: 360, 90, 180, 270. This should also make the same square.
Congratulations, you now know how to use a compass.
--Adapted from the Wisconsin Explorer program, Wisconsin Dept. of Natural Resources.


